Saturday, January 31, 2015

Creative Projects That Inspire My Heart

Today we're celebrating Unruly PaperArts blogozine's Inspire Your Heart With Art day. This is the place to link up something you've made that makes you happy to be an artist.  Something that is not restrictive to the creative process.


HOW TO JOIN THE PARTY--all directions in the 4 comments refer to the Unruly PaperArts blogozine.   Example:  #2 means follower of UPA, not me.

1. Link up any of your own creative projects (papercraft or mixed media) that inspire your heart, ie. uses products and colors you love and styles and imagery that makes your heart swoon, or that were simply created from the heart.  This means no Design Team or other Challenge Criteria should be used to make this project.  It is simply what you love to make with no restrictions or limitations as to what you do or use.  You can share your project throughout the event period (31st Jan to 2nd Feb) using our Party Link Up. The Party Link Up will be listed here below and open from 12.00am 31st of January.

2. You must be a follower of this site.

3.  Leave a little love for others, by commenting on at least the blogs of the person listed in the link up before you and the two people behind you.

4. Display our Party Badge (shown above) on your blog and link back to UPA HERE when you post your creation to your blog, galleries etc.


As you know, I see myself as a paper crafter.  What makes me "heart art" is when I can play with all those messy art products I've purchased, get out of my comfort zone, and just "let it go" ....

think song lyrics here to the popular movie, Frozen:

It's time to see what I can do
To test the limits and break through
No right, no wrong, no rules for me
I'm free
Let it go, let it go


Immediately I am somewhat breaking Rule #1 in that there is some challenge criteria used in my projects, but they are just a starting point--suggestions--to start the creative process.  And for me, what I love to make always hinges on where I can display it.   For me to learn, I seek tutorials from "the product designers" and then experiment with the products I've been introduced to.  It's great to get them off the shelf, break the seals on the packages, open them up, and then just play and see where the elements take me.

So here is a tag I made that takes me out of my comfort zone.  I created my own theme of "heart art" specifically for today's UPA link up party.  I chose ChitChat words that define what this art journey means to me.


Materials:
#8 manila tag
Tim's tissue wrap
Glue and Seal
Distress Paints:  Peeled Paint and Broken China
Distress Stain: Walnut and Tarnished Brass
Water mister
Chit Chat words
Black soot and Vintage Photo Distress Ink markers
white acrylic paint with splatter brush
gold ribbon
gold marker to edge tag


misc. chipboard letters and heart covered with
white gesso, painted with
Tarnished Brass Stain, coated with
matte gel---then art letters covered with
fine micro beads, heart covered with
Stampendous gold halo mix glitter


I used matte gel and micro beads as demonstrated by Finnabair in her CHA video.


I'm sharing this tag here:  

Tim Holtz 2015 Tags:  January
Finnabair Sparkle and Shine challenge
A Vintage Journey:  Love is In the Air


While I was at it, I decided to get Week 16 done for Claudine Criner's Altered Playing Cards challenge.  You can see her two card samples at her blog HERE.  She uses paint and Tim's tissue paper in her samples.  Since I had these supplies out on my work counter for the tag, I got these cards done too.  (I'm so far behind--anything to help me catch up!!!!)

Again, although there are some suggestions, this project is just for fun and we can create anything we wish!


I used Tim's Distress paints for the base coat.  I started with Peeled Paint on one card and decided I didn't like it as a color under the map so I wiped off as much as I could with a paper towel and then put on a top coat of Broken China.  On the other card, I used Seedless Preserves.

I chose digital images from Vera Lane Studios etsy shop to color, fussy cut and place on the card bases.

Plum card:  sticking with the "I heart art" theme, my card focuses on making art.

Green card:  I knew from the start when I changed the base color to green that I wanted to do something with that map on the tissue to represent a "go green" earth day theme.  I thought this digital was perfect for finding art in nature. I was sooo tempted to add pearl centers to the flowers but I'm determined to keep these cards "flat" for shuffling.


While I was printing out these digital images, I added a few more on the page to make a couple of greeting cards.

This is a thank you card for a teenage girl who gave up her room while we were visiting so that we'd have a great space to stay in!  I used Copics in colors that matched her bedspread.  Actually, I chose these particular Vera Lane Studios images because they looked so much like the bedspread design. My random paper patchwork colors are from the Christy Tomlinson She Art collection. You'll note the card doesn't actually say thank you-because the images and sentiments I chose are highly personalized.


And that is how I make art from my heart. Start with some on-line inspiration. Do my own thing. Share it.  As you can see, there usually is a snowball effect--one thing leads to another.  How did I get from chitchat stickers to inspirational word clouds?

I hope you share something artful that inspires your heart.  I'd love to see it linked up at UPA here.

Wednesday, January 28, 2015

Coffee Valentine

I didn't realize how much I was influenced subconsciously by guest designer Tenia's coffee card until I went to post my entry over at STAMPlorations.  The post was from January 2, and as you can see my post is on January 28.  That's a lot of time in-between to remember the idea.  (She used rings for her background--hers were white on dark brown and very much more orderly--I went with a random design.)

First I tried coffee splatters by actually tossing some coffee from my cup onto this card.  I also dipped a cup into the coffee and tried to stamp coffee cup rings.  None of this worked.  The card absorbed the liquid and left no stains--perhaps because, to begin with, the card was a toothy dark kraft stock.

So I resorted to stamping with Archival "coffee" ink (perfect color choice, of course!).  I used a glue jar for the rings and then a Crafty Individuals ink splats stamp, literally to make splatters.  I used the "roll" technique, rather than putting the stamp on a block which gives an uneven effect to the stamped image--perfect for a "blotch".  I also used the "kiss" technique, meaning I stamped twice without re-inking, which creates two different intensities of color.  Finally, you'll also notice a few finger smudges in a lighter color, as if I tried to "mop up" the spill. That would be the sum of my inking technique for an inky background.


Other Materials:
STAMPlorations Eat Drink Be Merry stamp set:  sentiment and coffee cup
Stampin' Up early expresso ink for the stamps
Stampin' Up very vanilla and early expresso card stock (what can I say, I'm on a roll with the theme)
1-3/8" circle punch
1-3/4" scallop punch
Wilton red doily for a pop of color (I love red with kraft)--I kept with the "circle" theme but added a punched heart that was a reject from another project--it was the perfect little touch of  "Valentine".


Challenges I'm Entering:

STAMPlorations January Ink and Stamp challenge
By completing this challenge, I'm in the running for the frequent player prize, as I now have entered all three challenges offered in January.  Plus I was able to put a couple entries in the never ending Anything Goes challenge.

Hiding in My Craft Room:  Challenge #184 Any Holiday x

The Crafter's Cafe Challenge Blog #101 Create Your Own Background x

Time Out Challenges #23  Valentine's Day with optional twist of hearts x

Entering these two challenges because I'm working on my coffee splatter technique AND with my new STAMPlorations Eat Drink Be Merry stamp set.

Simon Says Stamp Work It Wednesday:  New product/technique

Crafty Gals Corner:  Challenge #4 Try Something New until Feb 3 x

Macarons

For some reason I always use crumb cake paper when I get out the macaron stamps.

I like the way this embossing folder literally texture fades away, leaving room to stamp directly onto the card.  I combined the I love you like I love coffee stamp with the word stamp macarons.  And the women in our family really love macarons!


Materials:

Stampin' Up crumb cake and very vanilla card stock
STAMPlorations stamp sets Eat Drink Be Merry and Sugar Rush
Sizzix Tim Holtz Alterations embossing folder
Versa Magic Gingerbread chalk ink

Entering these challenges:

STAMPlorations Challenge:Bi-Weekly Sketch  #26 due January 30 x


STAMPlorations Anything Goes challenge (never ending challenge)

Shopping Our Stash Challenge #186 Love me do until Feb 2 x

Celebrate the Beginning of a New Year Card

If you give a mouse a cookie (aka domino effect)......  I couldn't find a quote or saying about Father Time that seemed appropriate, so I wrote my own. Then I found an image that matched the digi paper perfectly.  And then I found a sketch that made it all come together.


Entering These Challenges:

12 Months of Christmas Challenge: #1 January Father Time is the theme for extra consideration.  New Year's is acceptable as one of the December holiday cards. This is my second card for the month so that qualifies me for another free digi paper from Decosse's Digital Doodles.

Sentimental Sundays: Challenge #243 Anything Goes x

Crafty Hazelnut's Patterned Paper January challenge x


Materials:

Decosse's Digital Doodles--digital paper
Black Heart Art etsy: champagne celebration digital image
My own wording added via computer generated type
various Copic markers
sparkle pens
Stampin' Up gumball green cardstock
misc. golden paper from stash

Friday, January 23, 2015

Hearts

This is a pop-up diorama card.
Instructions for assembling may be found at Split Coast Stampers site HERE.
To achieve this effect, you will need shapes (hearts, squares, etc.) of different sizes that nestle.  This card uses a set of heart dies.

One of the nice things about getting together with other crafters is that you can experiment with a project such as this and help each other figure out the directions.  That's what happend a couple of days ago.  Everyone brought their own supplies, so the variety of cards made from the same instructions was amazing and inspirational.

I used a very old Making Memories Love Notes paper pack.  The wide variety of patterns worked together for this composition.  One of the things I did was to make a paper quilt pattern with 3 of the papers which you see on two of the hearts.  This also is a very old sheet of 12x12 red cardstock.  I love using up my stash for these types of projects.


Challenges I'm entering:

Time Out Challenge: Valentine's Day with optional twist Hearts
Addicted to Stamps Challenge #128: Holiday
Simon Says Stamp Wednesday Challenge: Have a Heart
Mema's Crafts: January Anything Goes

Sunday, January 18, 2015

Christmas Gumballs

Let's hear it for sweet treats!

Did you get candy for Christmas?  My cousin always sends a box of candy from the shop where my mom worked part-time as a teenager.  A sentimental gift for sure.  She always sends her gifts out early, and I'm always running late.  Since the candy comes early in the month of December, this card doubles as a thank you and Christmas card.   In keeping with the Christmas theme for challenges, I used green paper and think this fits the December holiday occasion category.


In my software program, I layered the jar on top of the thank you paper and printed it out with a white border.  I adhered this to the gumball paper which I had printed out separately, and then placed the layers onto a green cardstock card. (I love that the card stock name is "gumball green"--a perfect backdrop for Kris' gumballs.)

Products Used:
Imagine That! digis by Kris:  Jars of Cheer and Sweet Tooth Papers
Stampin' Up Gumball green paper

I'm entering the following challenges:
Imagine That!  January Use Any It Digi
12 Months of Christmas Link Up: January  This is card #1.  I'm using one of their sponsor's products although that is not required.
Scrappy Moms Stamps Terrific Tuesdays Challenge: Sugar Rush (her stamps not required to enter; new challenge site for me)


Baby Girl Card

One of my new year's resolutions is to make my challenge entries relevant so that I can actually use them--give them away, mail them out, etc.  So here's a cute baby girl card which I'm sure will come in handy this year.


Materials:
A Creative Need January digi freebie of baby girl shoes
Copic Markers: RV02 Sugared Almond Pink and RV32 Shadow Pink
Wink of Stella Dark Pink 027
Sharpie Black
papers and sentiment from stash--lots of old stuff that I'm using up.

Papers are edge distressed and paper pieced together.  Ranger Antique linen distress ink added.

Entering These Challenges:

A Creative Need: January Challenge:  Celebrate Something New  due end of month, winner announced Feb 6   ---WINNER!!!!
Creative Card Crew Challenge #78 For a Child ends January 18 noon  (winner random draw) --WINNER!
Tuesday Throwdown: #227  Sketch   due Monday  x

Saturday, January 17, 2015

Wine Journal

For my milestone birthday, the family gave me a weekend in Napa, California for a little wine tasting.  I decided to make a Wine Journal as part of a "junk journal" of the trip.


This is a digital creation using Crafty Secrets Wine Lovers digital stamp set.  After using various elements in the set to create my journal, I printed it out and colored it with Copic markers.


Entering these Challenges:

Crafty Secrets Linky PartyJanuary due midnight Pacific time January 18
Hiding in My Craft Room Challenge #183 Color It due January 24
Top Tip Tuesday: Challenge Keep It Simple  x
My tip:  Copic markers do not make the ink bleed on injet printed digital stamps.

Friday, January 16, 2015

Invitation to Tea

I've joined the STAMPlorations stamp club.  I get a new stamp set every two months.  My plan is to join in the monthly challenges.  My purpose is to make things that I'll be able to give away or mail out--useful, useable papercrafting.  I guess that's my craft motto for this year.

So here I go with the first challenge.  I made a card using the sketch.


Materials Used:

STAMPlorations Eat, Drink, Be Merry stamp set (tea pots and sentiment)
Gecko Galz Tea Time digital stamp (girls)
Samantha Walker Tea Time digital paper set (3 patterns)  I love how the stamped teapots match Samantha's patterns on her digital pots!
Ranger ink:  Wendy Vecchi Forget Me Not Archival Ink, Tim Holtz Broken China and Wild Honey Distress Markers
Dimensional foam behind sentiment and one teapot

STAMPlorations Challenge #25 Sketch due January 16


Stamplorations Never Ending Challenge:  Anything Goes (using STAMPlorations stamps)


Pile It On #51 Something Edible

My Heart on a Silver Platter

It's time for another challenge from My Artistic Adventures.  The theme is LOVE and the challenge rules can be found HERE at the challenge blog.

I created  a 6x6 inch heart shaped Valentine.


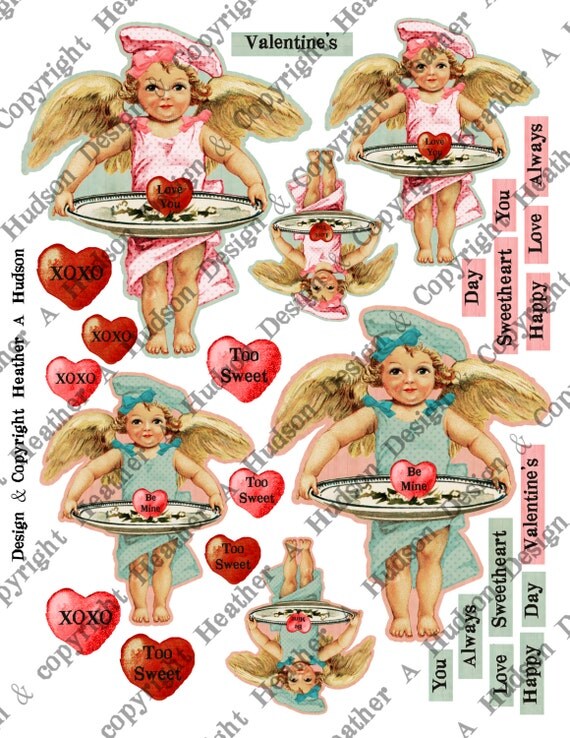
using Heather's

Victorian Vintage Valentine's Day Shabby Pink and Aqua Cherub Angel Hearts Digital Collage sheet Printable

Victorian Vintage Valentine's Day Shabby Pink & Aqua Cherub Angel Hearts Digital Collage sheet Printable

which can be found in her Etsy shop, My Artistic Adentures HERE.

Starting today and running through Feb 14th if you purchase $20 or more of her Digital Collage Sheets, she will email you the collage sheet set to create the banner --which you can see at the challenge blog-- for free!!

I used a white cardboard heart, covering it with a red doily, then fussy cutting the chrerub and placing on top.  I adhered bows and the "always" word strip.  I finished with Wink of Stella for some pink shimmer.

Heather now has some yummy digital paper packs in the shop along with her collage sheets.

I hope you have time to play along with our latest challenge.  If you use any Heather's images, you are in the running for a free collage sheet and a guest designer spot with free MAA product to use in your design..  Otherwise, you still may qualify for the top three badge.

Tuesday, January 13, 2015

Traveling the Globe at Unruly Paper Arts Blogozine

The New Year is off to a great start at Unruly PaperArts!

Our first month's theme in 2015 is Let's Face It and the Schedule of Contents for the month is a great way to keep up to date with our frequent posted articles. We are half way through the month so I hope so far you've found all of the blog posts inspiring.  If you are unfamiliar with our concept, our blogozine posts new articles throught the month, has featured guest artists and product sponsors, and has a month-long craft challenge for our readers called Reader Art Quest. The RAQ details are over at the UPA blog HERE.  And the mid-month inspiration is HERE.

Global Traveller is this month's Reader Art Quest at Unruly Paper Arts blogozine.  How are you going to interpret the theme?  Even though we're half way through the month, you still have plenty of time to link up your creation to the UPA RAQ post.


As a UPA teammie, this month I made something as a RAQ sample for our mid-month inspiration. How did I interpret the theme?  I decided mail art was a global traveller.  Here is my envelope:


I started with a large white envelope and stenciled it with Tim Holtz Collection Rays stencil.  On separate paper I stamped from the Art Journey Steampunk 2 stamp set.

On all three, I used Pan Pastels: Chrom Oxide Green, Titanium White, and Violet Shade.  Pan Pastel is this month's UPA sponsor. A link to the Pan Pastel site is HERE.

Colorfin LLC

This is a new product to me.  I watched their on-line videos.  I used the special sponge to apply the pastels and even tried using a rubber eraser.  I did need a fixative and discovered Ranger Perfect Pearls Mists in Sunflower Sparkle worked well while adding a touch of shimmer.  Usually when I want the light to catch the glitter or shimmer, it doesn't show up in the photo.  This time, it REALLY showed up.  There is more violet showing through when not in direct light.

Under the rays, I placed a map, a digital image from Gecko Galz Old World Maps collage sheet. I altered the color just a tad to match the Pan Pastels.

I then added a "postage stamp" from Graphic 45 Steampunk Debutante paper collection.

I created a wax seal with Amazing Mold Putty from Amazing Crafting Products.  They were UPA's November sponsor.  A link to their site is HERE.

Amazing Crafting Products

How did I do this?  I rolled the putty into a ball and then imprinted the metal chevron from my wax seal set.  After the putty mold was ready, I filled it with melted sealing wax from the wax seal set. Yes, I could have just used the wax seal set as intended, but I wanted to experiment with the mold putty.  I was pleased that the putty mold held it's shape and did not deteriorate when I added the melted sealing wax.  Since the wax set up immediately, I cataloged this technique as a speedy way to create something using the mold.

Once everything was in place, I began stamping with various rubber stamps in my collection.

The "mail your art all over the world" stamp is from Viva Las Vegas Stamps.  The rest are from a retired set made by Red Lead Paperworks, Inc.--except for the "he hath wings" which actually is a Red Lead label "she hath wings" from a label stamp set. I merely used an ink marker on the letters I wanted to print.

I'm entering this in the following challenges:
Lunagirl Moonbeams Challenge:  Postcards and Letters due January 22
Simon Says Stamp Monday Challenge:  Inky Background
STAMPlorations January Challenge:  Stamps and Inks  due January 31
Gecko Galz Papercrafting Facebook Challenge Group:  All That Shimmers

Friday, January 9, 2015

Fashionable Tissue Card

One of my new year's resolutions is to take time to explore new challenge sites and try new things. Into my lap drops an Adorn blog post from Lynne Moncrieff, one of the designers I follow.  It seems Paper Artsy has a new focus which is just what I'm looking for.  A little space and measured pace to create based on interesting themes.  No pressure.  But the first topic is fragile papers which is one of the things I own lots of and I had a project available to enter, so here I go.


The fragile paper I chose is tissue paper from a 1977 Simplicity pattern.  I told you I had lots of old paper in my stash!  Here is a picture of it, a real blast from the past:


Lucy Edmondson talks about making tissue paper stronger in her Paper Artsy post HERE.  She glued hers to acetate packaging to make flowers.  I  glued mine to cardstock to reinforce it prior to the pressure of dry embossing.  I also am inspired by how Lynne Moncrieff stains her papers.

I have seen lots of posts about: 1) creating master boards, 2) if you stamp once--you may as well stamp several, 3) color your images while watching television,  4) swipe a second tag through the leftover paint, etc.--all so things are ready to go when you want to create something new.  So I came up with the idea to use up the tags I've been making over the years that are sitting in a pile.

Enter the tag made in July of 2011.  Whew!  Really?  That would make it 3-1/2 years old!
Ranger Products:
Distress Inks:  Black Soot and Worn Lipstick with Walnut Stain
Embossing Powder: Clear
misc. trims and gems from my stash  
bird from a Hero Arts stamp stamped onto red paper, heat embossed, fussy cut and adhered with pop dots
Studio 490 sentiment from Art Fit for a Queen stamp set
To update it a bit, I changed the bow at the top and changed out the embellies at the bottom to black pearls.

Fast forward to the present.  I was in need of a card for someone graduating in the world of business/ fashion.  Out comes the tag and a base is created for it to become a card that fits the occasion perfectly.

Black card stock base.
Vanilla card stock topped with the Simplicity pattern torn and paper pieced with glue.  This made the tissue stronger and able to withstand embossing with some Tim Holtz folders to create an embossed pattern on top of the tissue design.  Gently I rubbed Ranger distress ink onto the raised embossed areas. Then I adhered it to the black greeting card.

When done, the tag was placed on top to complete the card.

I'm sharing this card in the Paper Artsy Topic 1 Fragile Papers HERE.

Thursday, January 8, 2015

Buzzing By with New Year Resolutions

I promised a post about my New Year's Resolutions and then I took off for sunny California without posting!! (Please refer to resolutions #1 and #2!!!!) I'm back now, ready to share.......

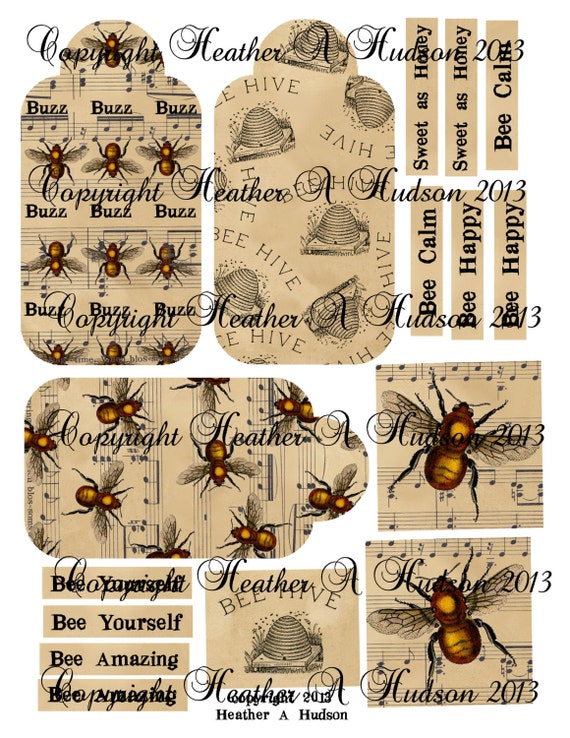
I usually have a list a mile long but I decided to keep it short and sweet in 2015.  Heather Hudson's collage sheet was the perfect choice for my  project.  This is a little reminder which I'm putting on my bulletin board above my computer desk in my craft room.


As you know, I'm on Heather's design team.  So I'd like you to consider entering her current challenge which is Anything Goes.  Details about the challenge can be found at the My Artistic Adventures (MAA) challenge blog HERE.  You'll find the challenge rules, great inspiration from the design team, and a look at her latest collage sheets and a digital paper pack.  AND mid-challenge inspiration pieces, including this one, can be found on the MAA blog HERE. I can't wait to see what you link up at her blog! You have until January 15.


Materials:
(Disclaimer:  Because I'm on the design teams for Rogue Redhead Designs, LLC and My Artistic Adventures, I've linked up to the products I used from their sites.  As a Creative Consultant for Unruly PaperArts, I received Amazing Mold Putty.)

Base:
Recollections Chalkboard black card stock
Coredinations color core card stock burnt sugar
Darice embossing folder Bee 3 Pack
Rogue Redhead Designs, LLC:  Getting Grizzly stamp plate: honeycomb background stamp
Ranger Distress Ink: Brushed Corduroy

Focal Design:
Wilton 4 inch black doily
circle punch
Starform Outline Stickers gold
Score Tape
Doodlebug Design Inc Doodle Twine
Tim Holtz Alterations Alphabetical die 
Sharpie marker: black
My Artistic Adventures Digital Papers and Designs Etsy:  Vintage Bumble Bee collage set:
(I used the digitally designed tag and the word strips.)
Vintage Bumble Bee Calm Digital Collage sheet

Molded Bee:
bee pin from my stash

Amazing Crafting Products: Amazing Mold Putty

Prima Finnabair Modeling Paste Opaque White Matte (used as casting agent)


USArtQuest Perfect Pigment Liquid Acrylic Paint Yellow Ochre
Ranger Distress Stain Tarnished Brass
Ranger Perfect Pearls Mists Sunflower Sparkle
Ranger Distress Ink walnut stain
Ranger Distress Ink Marker vintage photo


Entering these challenges:

Note:  for the something new challenges, I tried the amazing mold putty with modeling paste (new product to me) and used for the first time the My Artistic Adventures vintage bee digital collage sheet.  To match the black paper which had a sheen to it, I used the Tim Holtz Alterations Alphabetical die to make letters from the same paper.  This die is new--I got it for Christmas.  And, of course, the resolutions are for the new year.

Artistic Inspirations Anything Goes with a Touch of New Jan 18
The Artistic Stamper January Challenge:  New Beginnings end of Jan
Addicted to Stamps Challenge #95:  Use a Tag on Your Creation Jan 27
Crafting by Designs: # 122 January Anything Goes Jan 24
The Crafters' Cafe Challenge #98:  Something New Jan 24
Country View Challenges: January:  Something New end of Jan
Digitally Sweet Challenges #121 What's Your Favorite Shape (is it cheating that this creation has a rectangle, circle and square in it?--I do like the square which allows for symmetry and balance in the design.) Jan 27
Memascrafts January Challenge Anything Goes end of Jan
Open Minded Crafting: Challenge #27 New Year's Resolutions Due Jan 16, winner announced Jan 24
Simon Says Stamp Wednesday Challenge:  Something New Jan 12
Shopping Our Stash #183 Happy New Year and Use Something New Jan 12
Try It On Tuesdays:  My Favorite Things  (I love working with Heather's digital images at My Artistic Adventures, and I'd be lost without my embossing folders and dies.) Jan 19
Pile It On Challenge #50 Digi paper or precolored digi stamp Jan 10

Thursday, January 1, 2015

Happy New Year!

2015 has arrived!  I hope you thoroughly enjoyed this holiday season!

The January issue of Unruly Paper Arts blogozine is up and running.  The schedule of contents can be found HERE.  This month's theme is  Let's Face It.  And the Reader Art Quest is Global Traveller. You will see my RAQ inspiration mid-month, January 14.

Now that the holidays are past us and we get back to crafting, please keep in mind this exciting event:


Details will be on the Unruly Paper Arts blog soon.  I'm already planning what I will link up on January 30 to get things started..

Did you make any New Year's Resolutions?  I'll be back tomorrow with mine!


Blog Archive

Family Heritage Album