Sunday, February 28, 2010

Alfreda's Romantic Wedding

 
This is my first attempt at shabby chic.  I used Graphic 45 Romantique paper collection.  I cut the beige mat out from one piece, edged it with distress ink, and placed it on the Romantique/butterflies paper. There are two different patterned papers behind the wedding photo. And a hidden journal tag.  I cut out and added 3 brides and 3 butterflies.
Most of the supplies were in the Pages In Time February kit.  I used the PIT store blog February 4th sketch.  The darker brown flowers with netting and beads are Petaloo peonies. Many of the other flowers are Prima.  I think I used up all of my glue dots and foam pop dots on this layout! LOL

For the Gingersnap Creations lace/fibers challenge, I have on this layout:  a strip of lace across the bottom, a fiber twisted rope in varigated colors of pink and beige entwined with pearls woven in between the flowers, lots of texture on the various flowers including netting, two different ribbons, and a piece of tatting which I think was made by my aunt who's in the photo, my mom's oldest sister.  

Challenges for this layout:
Coordinates Collections Winter Crop: CC#2 Tea:  my take on it: vintage tea stained doilies
Pages In Time February Shabby Chic challenge to use pink and white
Gingersnap Creations GC42: Lace/Fibers
Simply Scrapping Crafts Love is in the Air February challenge:  This is a March 1st Featured Photo!


Amelia


I created this layout of Amelia Earhart for several challenges.  I love when the stars align that way.  And to prove it, just look at that Maya Road BINGO card stamp with the numbers 19 and 37 side-by-side, the year of Amelia's world flight attempt in her Electra!  
My sister-in-law rented the movie starring Hillary Swank and Richard Gere.  As I was watching it, I decided Amelia was a perfect subject to scrap.  She embodied determination, conviction, and courage.
Here are a couple of close-ups of the Digi-Inkco Daisy image which I downloaded, colored with Copics, put inside a gold frame and turned into a butterfly, using Maya Road hatpins and butterfly wings from Tim Holtz grungepaper Idea-ology Harlequin elements spray painted with Walnut stain and gold Perfect Pearls.

The layout base is Graphic 45 Fashionista paper as a frame with DCWV red cardstock trimmed down to fit on top.   Then I added Graphic 45 Transatlantique papers (which actually are about Lucky Lindy and the Spirit of St. Louis--but hey, I used to coordinate a non-traditional careers grant so I can make this work!).  I stacked the stamps and sign on cardboard for a 3-D effect.


The photo is public domain.  I texturized it in Photoshop Elements, then burned the edges (yes, I played with fire--very scary!) 

I just bought the gold star trim which is perfect for the circular part of the sketch.

Inks:  Tim Holtz for Ranger Distress Inks in vintage photo, tea dye, and faded jeans; Memento June Bug and Danube Blue
Alphas;  October Afternoon Hometown Newsroom

Challenges:
Gingersnap Creations GC43 3 Colors You Love (mine are blue, red, and vintage beige--we had a navy blue wedding and we have a navy blue and white dining room and living room; I own at least 8 red tops--sweatshirts, sweaters, etc.; and vintage beige goes with everything in my Victorian home)
Pages in Time Historical Challenge with name of person in the title.
Let's Capture These Sketches:  Sleepy challenge with word dream in layout
Coordinates Collections Winter Crop:  CC4: Photo Inspiration:  I took from the photo the crowned woman on the Starbucks coffee cup (Amelia--queen of aviation), the gold spoon (gold stars, frame and butterfly), and the linen napkin (vintage beige)

Saturday, February 27, 2010

Inchies

Here is another project from last Saturday's Stampers' Retreat in Springfield. The club members came up with this cute idea to make a frame with inchies.  This was the last of my four workshops that day.  I was tired and this one was time consuming.  I ended up working like a dog on this project yet was the last attendee out of the building.  The wood frame is from the dollar bin which I painted blue and edged with a silver leafing pen.  The inside is a sheet of aluminum foil run through an embosser, a double mat, with stamped and heat embossed trees, and my favorite part--a painted, decorated match box with a surprise acrylic dog inside.   I spent way too much time selecting my stamps for all 18 pre-cut inchies. After I stamped them, I colored them and then finished with a green crayon color wash.  The final step was gluing them onto the frame. 
I think this is a really sweet project.  I have some inchie stamps of  vintage children's faces. I think that would work up into a cute frame for a baby gift.
It seems to me that inchies were a rather popular topic these past two weeks because I saw them showcased on several sites.  I jumped on the bandwagon and did my last  Queen Kat Designs Stampin' Saturday Technique post on the topic of inchies.  To see it, click on QKD.

Friday, February 26, 2010

Prima Has a Secret

Prima has a secret coming out March 5.  In the meantime, two lucky people will win lots of Prima on
March 1.  Read all about it HERE.   And here's a pic of the winnings.

Thursday, February 25, 2010

Three Cards

Three cards I made this week. None are my original design. But I'm good at following directions. As you look at them, please note the importance of the background stamp.
Above:  I made this card and matching envelope at last Saturday's Stampers' Retreat. This was the make it/take it hosted by Judy. Hero Arts stamps and Ranger Distress Inks.
Below:  Then on Monday, I made these two cards at a Stampin' Up party. Stampin' Up stamps and ink.

Featured Photos

Another post today.  Both my Olympics skating layout posted on Sunday AND my Queen Kat Designs card made for the Monday blog hop (the two posts below today's) are featured photos today on Simply Scrapping Crafts.  I submitted the layout for the Punch or Die Cutter challenge.  When I made the QKD card,  I kept in mind the SSC sketch provided for the Copics just for fun challenge.
UPDATE:  I see that my blog is up on Gingersnap Creations' homepage sidebar this evening.  I'm lovin' all of this attention.

Tuesday, February 23, 2010

I Love Olympic Ice Dancing and Figure Skating

What was your first clue that I'm glued to the TV watching the ice dancing competition?


I don't make digital layouts, but this layout is composed of 3 different digital downloads: My Grafico Co digital download skate (Stickles highlight embossing on cardstock, eyelets for silver ribbon lacing, wired ribbon for cuff, Rock Candy Stickles for ice on blade); Graphics Fairy vintage skaters digital image (decorated with red Stickles and Hero Arts flower gems), Digital-Inkco skaters; gold cardstock circles cut from Nestabilities circle diecuts; patterned paper: The Paper Studio Winter Blue Snowflakes.


Made for: a scraplift challenge on Pages In Time; Love is In the Air Contest on Coordinates Collections; Brag Monday on the Graphics Fairy. and at least one challenge on Simply Scrapbooking Crafts.

Monday, February 22, 2010

QKD Monday Royal Court Blog Hop

Hope you had lots of fun at the QKD SWEET ON-LINE CROP this past weekend!  If you were creating lots of crop projects, now's the time to sit back with a cup of coffee, relax, and enjoy today's hop!  To start at the beginning of the QKD hop and to find the complete hop list, please click here on the words: Queen Kat Designs.  If you've been hopping along, next up is Penny.  Tomorrow (Tuesday) the rest of the QKD Design Team shows us their inspiration creations. 
Today the Royal Court was challenged to use this sketch for inspiration.  I was drawn both to the bold colors and the rectangular graphic design. We also were to use one of February's stamp releases. I chose the QKD Bon Voyage set.


Today I used the entire image of the Bon Voyage stamp. But I stamped it three times, colored all three images, then cut out different portions and layered them.  The suitcases are layered once, the purse and hat are layered on top of the suitcases, and the purse flap is layered a third time.  Here is a side view of the layering showing how it  adds a nice dimension to my card.

Be sure to stop at the Queen Kat Designs Store at the end of the hop.  You can always use my discount code HH10 for 10% off.  

This is my final blog hop as a member of the QKD Royal Court.  My last Stampin' Saturday technique post will be this Saturday on the QKD official blog so look for me there. I've made many cyberfriends through QKD.  Rather than say Au Revoir, I'll say keep in touch with all things QKD--and me--at the Castle here --->   Queen Kat Designs Stamp Co.


Sunday, February 21, 2010

Art Retreat

I spent yesterday in Springfield, IL at an all day retreat with my Prairie Stampers Club members.  We had four two-hour workshops and a yummy pot-luck lunch.  There were over 30 participants so, as usual, we had an abundance of food, especially chocolate desserts (great minds think alike!)  Some of the members graciously agreed to teach the 4 workshops and a make it-take it card.  We had an interesting variety of art:  felted egg, inchie frame, necklace, and accordian folded mini-album.  I'll be posting the projects all week on this blog, in-between some layouts and cards I'm making for challenges.  Here's the first one.

Gail and Karla showed us how to make this necklace.  We used tiny dollhouse wood shutters (punch a hole with a Cropidile to make it into a charm).  We covered them with Art Girls stamps, color pencils, Glossy Accents, and rhinestones. I also learned how to make my own paper beads.  Since I craft instead of cook now, I found a new use for the wood kabob skewers (wrapping the paper around one to make the bead)!!!  I'm showing this project first because the necklace has 3 female images on it, a perfect segway into my next paragraph. 

A big bonus to the retreat day was meeting my two cyberfriends from the Everything Wendy Vecchi (EWV) Yahoo! Group.  This group loves Wendy's art style and her own line of Studio 490 stamps.  We chat about Wendy's workshops and share art made with her stamps.  At that site, I've joined the birthday club (where we make birthday cards and send them to each other) and an ATC swap coming up in March. The three of us spent the day crafting together.

Monday, February 15, 2010

QKD Royal Monday Blog Hop

This week the Royal Court was challenged to use the color combination of brown, red, and aqua.  Perfect colors for Valentine's weekend--I'm thinking chocolate candy and red roses!   To start at the beginning of the QKD hop and to find the complete hop list, please click here on the words: Queen Kat Designs.  If you've been hopping along, next up is Penny.  Tomorrow (Tuesday) the rest of the QKD Design Team shows us their color combo creations. 
Here's a thank you note set that I made for the Websters Pages Christmas Crop 2009: Thank You Cards Challenge.  I followed the basic challenge design sample (two strips of paper with a ribbon in the middle), using a piece of patterned paper and aqua vellum from the WP Life is Beautiful set. (I used the MS lace punch on the vellum.)  I added some ribbon from my stash and the Give Thanks quotation from the Queen Kat Designs stamp set of the same name.  (In the background you see the decorated tin using alcohol inks, more of the WP paper and a bow.  The note cards fit inside the tin.  The set was made as a holiday gift.)

This set was a featured photo on the Websters Pages Inspire Me site, but this is the first time I'm showing it for a QKD blog posting. (I've been saving it for when the time was right, hoping to get it in before my days on the royal court come to a close.) Just goes to show you that you can use QKD stamps for a wide variety of projects throughout the year!  The paper is from a summer set, the quotation stamp is from a QKD Thanksgiving set, the set was given as a Christmas gift, and the note card would work as a Valentine thank you for those chocolates and roses!  

Be sure to stop at the Queen Kat Designs Store at the end of the hop.  You can always use my discount code HH10 for 10% off.  

Hope to see you at the QKD SWEET ON-LINE CROP this weekend, February 19 through February 21, at the QKD Castle.  Here's the link to sign up:   Visit Queen Kat Designs Stamp Co.


See you here at my blog next Monday for another QKD Royal Court Blog Hop! It will be my final blog hop as a member of the QKD Royal Court. I'm finding it hard to believe the eight month run is over.

Friday, February 12, 2010

Happy Valentine's Day

I love this multidimensional card that I made last year for Valentine's Day. It started with apurchase from Red Lead and their idea of two felt hearts hand-stitched together and covered with vintage lace and pompoms.  From there I gave it my own spin with a Maya Road velvet flower and mounted everything onto a Jenni Bowlin bingo card. The Hero Arts stamp and grunge board are a perfect match for the molded banner that I painted pink before stamping. The red jewel heart and crepe paper complete the look. I've filled the pocket card with candy and a vintage Valentine find.

Tuesday, February 9, 2010

Birthday Club

Twenty of us signed on to the Birthday Club at the Everything Wendy Vecchi Yahoo! Group (EWV) to make and send cards to each other on our birthdays.  I'm fairly new to the EWV group, so to make my first card I just followed Wendy's tutorial on page 12 of her book (Make Art Studio 490 Style).  That forced me to make a grungepaper flower that I've never made before.  The tutorial was for a wall hanging, but I was making a card.  And I didn't have all of the stamps she used, but I had enough to create something "close enough" yet not a clone.  Obviously, I used Wendy's Studio 490 stamps--and a lot of Tim Holtz Ranger Distress Ink.  The recipient has received her card, so now I can post it here.

American Idol goes to Hollywood tonight!  Time to get serious about who I think will be the next Idol.

As I promised yesterday, I'm reminding you to check out the Tuesday QKD Royal Court Blog hop. To start at the beginning of the QKD hop and to find the complete hop list, please click here on the words: Queen Kat Designs.

Monday, February 8, 2010

QKD Royal Monday Blog Hop and 2nd February Stamp Release

This week the Royal Court was challenged to use a QKD sketch to reveal the February stamp sets being released this month in the on-line store. BON VOYAGE is the set I'm working with for today's hop. To start at the beginning of the QKD hop and to find the complete hop list, please click here on the words: Queen Kat Designs.  If you've been hopping along, next up is Penny.  Tomorrow (Tuesday) the rest of the QKD Design Team shows us the sketch they used to reveal February's stamps.  I'll be back tomorrow to remind you about the second hop, and I'll have a direct link to it!
 
This past Saturday on the official QKD blog, the technique I wrote about was distressing paper with ink, first by crumpling the paper, then going over the creases with an inked up sponge applicator.  I promised if you'd come back today for the hop, you'd see the finished card.  Here's a photo of how I used this technique on the map of Paris I obtained from the Graphics Fairy:


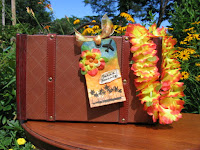
And do you remember this suitcase that I used as a backdrop when I took a photo of a QKD card made this summer? I took another photo of the suitcase, printed it on matte paper and cut it out for an embellishment.  I used the suitcase instead of a piece of rectangular paper for this sketch and I turned the sketch on its side.
This is a great stamp set.  I used only one of the stamps and divided it into 3 separate images for the card.  This is a great way to make your stamps more versatile--just ink up a portion of the stamp.  I printed the luggage, hat and purse section of the stamp onto a copper rimmed luggage tag and then colored it with Copics.  I stamped the Bon Voyage sentiment section onto canvas paper and then cut it out and inked with faux stitching to make it look like one of those suitcase travel stickers.  And lastly, I stamped the Eiffel Tower portion of the stamp directly onto the map.  A few pieces of Tim Holtz hardware complete the travel theme.

If your speakers are on, I hope you enjoy the music!  Edith Piaf is one of my most fave singers of all time and posting a couple of her songs on my Playlist really brought back memories!  Mon Dieu is my favorite Edith song.

Be sure to stop at the Queen Kat Designs Store at the end of the hop.  Check out the current 35% off sale  OR  you can always use my discount code HH10 for 10% off.  
See you Saturday at the QKD blog for another technique article.  See you here next Monday for another QKD Royal Court Blog Hopl!

I'm putting the Graphics fairy Brag Monday logo on this as well.
This card wouldn't be the same without using her great image of the Paris map.  So I have to brag about it!

Saturday, February 6, 2010

Altered Glass Jar

This weekend, I'm participating in an on-line Valentine Crop at Pages in Time.  I'm plugging away at the challenges, one at a time.  Here is my first one--the altered item.
I also moderate a group at Pages in Time called Hybrid and Altered Artists.  Several of us have been talking about altering our embellishment containers.  I used today's challenge to finally get mine done.

I took a very pretty image from the Graphics Fairy and Modge Podged it to the front of my glass jar.  I had distresssed it with scissors and ink so that it would look like a worn label. When I covered the image with MP so that it'd hold up longer, a little of the ink smeared, but I like the effect--it now looks old. 
Since this is a working container, holding my flowers, I decorated the lid so that it would be functional.  Ribbons, flowers and the butterfly were items I already had on hand.
I love how the little girl looks like she's holding some flowers for me to use on my projects.

Friday, February 5, 2010

GC39 Color Challenge: Metallics

Here is my entry for the metallics challenge. After using fluid chalk ink to color the tag green, I sprayed a mixture of water and gold Perfect Pearls on it to give the effect of "raindrops" since the cherub is holding an umbrella. I used Adirondak gold metallic paint dabber to edge the tag and painted a couple of spots on the tag. I also added gold scrap border. Valentine image from Red Lead Paperworks. Websters Pages background paper.

Thursday, February 4, 2010

Objects of My Affection Valentine Tag Swap

This is my first sister swap at Red Lead Paperworks, a spectacular St. Louis (technically Webster Groves) store, loaded with lots of trinkets and craft goodness to inspire creativity.  It is such a treat to shop there.
***Objects of my Affection Valentine Tag Swap***
Due Date is Feb. 5, 2010
Sweet and Simple Swap- Make 4 Valentine Tags- Get 3 Back! 
Here are the four tags I made and sent in, using Red Lead images and stamps. 

Tuesday, February 2, 2010

Her Days Were Numbered: GC40 & EWV Swap


Three things on this post:
1) Here is the tag I created for Part Two of the Everything Wendy Vecchi Yahoo! Group Rose Tag Swap.  Deets about the swap are below the tag.
2) One of my cyberfriends posted about a challenge on Gingersnap Creations.  What a wonderful challenge site!  I'm including this tag in their GC40 Random Redhead Challenge: Numbers
3) Reminder about the rest of the QKD Design Team's Tuesday blog hop.

This is from my first completed project at the Everything Wendy Vecchi Yahoo! Group.  Part One:   I made some roses using Wendy Vecchi's Studio 490 Dimensional Rose Art stamp set, Tim Holtz Ranger Distress Ink, and Grunge paper.  I swapped roses with Dawn.  Part Two:  I took the purple rose Dawn sent me and made this tag that I sent to my round two swap partner, Allie.  Image used was posted at Pages In Time. After printing it, I edged it with Adirondack gold metallic paint dabber. Colorbox fluid chalk for lavender background of tag.  I used the same Studio 490 stamp set for both the number background (stamped with Tim Holtz Ranger Distress Ink in Dusty Concord) and the leaf (finished with Perfect Pearls for shimmer). Computer generated title, cut up and distressed with ink.

And here is a photo of the tag Allie made with Sammie's rose and sent to me:

As I promised yesterday, I'm reminding you to check out the Tuesday QKD Royal Court Blog hop. To start at the beginning of the QKD hop and to find the complete hop list, please click here on the words: Queen Kat Designs.

Monday, February 1, 2010

QKD Royal Monday Blog Hop and February Stamp Release; Brag Monday Graphics Fairy and GC38


This week the Royal Court was challenged to use a QKD sketch to reveal the February stamp sets being released this Wednesday in the QKD store. ON A HIGH NOTE is the set I'm working with for today's hop. To start at the beginning of the QKD hop and to find the complete hop list, please click here on the words: Queen Kat Designs.  If you've been hopping along, next up is Penny.  Tomorrow (Tuesday) the rest of the QKD Design Team shows us the sketch they used to reveal February's stamps. And I'll be back tomorrow to remind you about the second hop, and I'll have a direct link to it!

Deets on the materials used to make this card:  the Graphics fairy website:  ballerinas image; Tim Holtz for Ranger Distress Inks:  black soot, tea dye, antique linen, and weathered wood; 3 black faceted beads for notes; Versa Mark and Tsukineko #07 Black embossing powder; Copic markers in E00, E31, E35, E37, E50, C3, W3, and Prismacolor marker 115; scallop punch; Spellbinders Nestabilities Circles Standard Large, metal crown cut to fit; Sakura black glaze pen; Graphic 45 Communique patterned paper (records).

Be sure to stop at the Queen Kat Designs Store at the end of the hop. You can always use my discount code HH10 for 10% off.  
See you Saturday at the QKD blog for another technique article.  See you here next Monday for another stamp reveal!

I'm putting the Graphics fairy Brag Monday logo on this as well.
This card wouldn't be the same without using her great image, Ballerinas2a. I took artistic liberty and reversed the image so that the ballerinas would be facing the 3 circles of On A High Note images.

GC38 Spicy Supply Challenge: Embossing
I heat embossed all three images in the circles using Versa Mark and Tsukineko #07 Black embossing powder. 

Blog Archive

Family Heritage Album